Thursday, January 26, 2012 11:48 AM
The process of extruding one 2D profile such that it ends in another, different 2D profile is often called lofting. There’s no easy way to do this in plain ol' SketchUp, but there are plenty of plugins that make it possible. The one I’ve been obsessed with lately is called Curviloft; it's by the venerable Fredo6. If you need to learn about plugins in general, including how to install them, visit the plugins page on our website.
Curviloft lets you do three basic operations; which one you use depends on what you’re trying to accomplish. For the sake of brevity (and simplicity), I’m going to focus on only the first operation in this post: Loft By Spline.
The Basics
The Basics
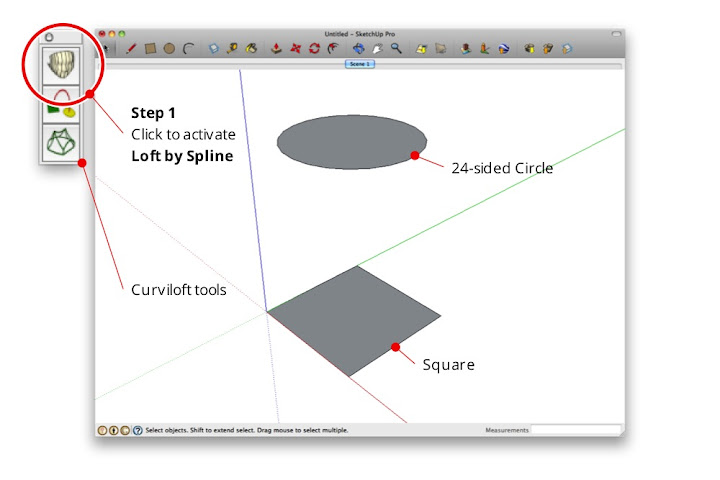
Let’s say you have two profiles that you want to connect together. The example below is super-simple: It’s a circle directly above a square. Here, I want to connect the two with a shape that goes directly between them. Curviloft’s Loft By Spline tool was made for just this kind of thing.
I start with two flat profiles (shapes) positioned one above the other.
Fredo6's Curviloft plugin includes three handy tools. This post deals with the first one: Loft by Spline. To use it, you need two or more profiles. These can be closed shapes (as above) or simple, unconnected edges (see the end of this post for an example).
With nothing selected, I activate Loft By Spline and click once on each shape. Because there are only two, it doesn’t matter which shape I click first. If there were more than two, I’d click in the order that I want to connect them, starting at either end. When both profiles are numbered, I click the green checkmark in the Curviloft toolbar (see below). This brings me into Preview mode, where I can see what I’m about to end up with.
Activate the tool, then click on the profiles you'd like to use as the endpoints for the shape you're trying to create. When you're done, click the green checkmark to enter Preview mode.
The Curviloft toolbar is complicated; there’s no getting around it. The good news is that you don’t have to understand what all the controls do in order to use the tool. In Preview mode, you can just click things to see what happens. There's no shame in experimentation.
The Curviloft toolbar is a doozy, but you can (and should) click buttons to see what happens. Every case is different, and some settings look better than others.
When you perform a Loft by Spline operation with Curviloft, the tool is generating two different kinds of geometry which it later combines. Intermediate profiles (left) are "in-between" 2D shapes spaced between the profiles you start out with. Splines (right) are lines that connect adjacent profiles together. They can be straight or curvy, depending on the settings you choose.
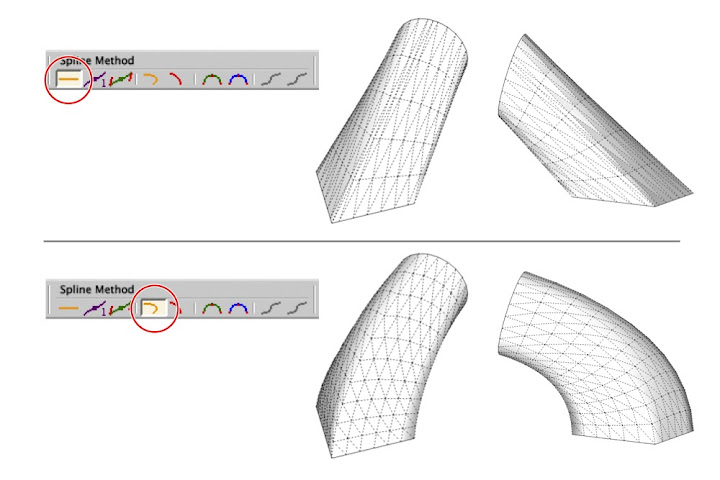
I like to fiddle with the Spline Method settings first (see below). This is where you control the shape of the vertical lines (splines) that connect the two profiles—in this case, the circle and the square. The three options that I find give the most interesting results are “Junction by connected lines”, “Bezier curves – Respect tangency (Method 2)” and “Junction by Orthogonal Bezier Curves”. By all means, try the other buttons, too; there’s gold in them thar hills.
Different settings usually produce fairly different results. Click around until you like what you see.
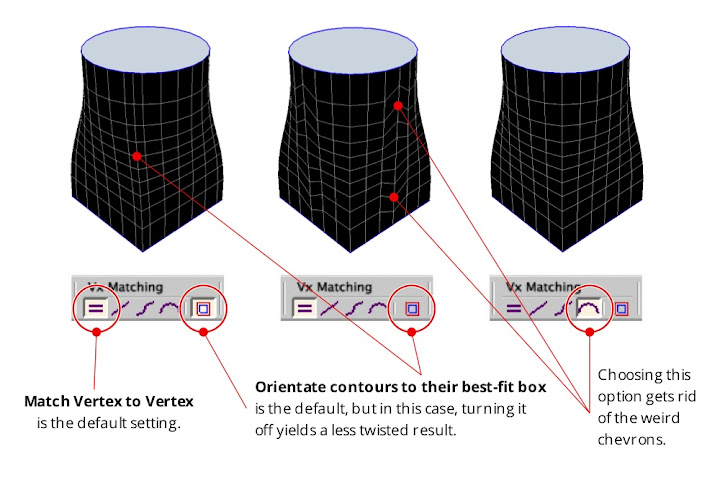
Playing with the Vertex Matching controls also yields some useful options (see below). Here, you’re telling Curviloft how to decide which points on the perimeter of each profile should connect to one another. In this case, the circle has 24 endpoints and the circle only has four. The tool does its best to figure out the intermediate geometry, but the Vertex Matching settings let you provide guidance. For me, the most interesting button is the one on the far right; often, deselecting “Orientate contours to their best-fit box” seems to produce better results. Click it a few times to see what happens.
To be honest, I really don't understand what these buttons do. I have eyes, though, and I can tell what looks good and what doesn't. I bet you can, too.
When you’re satisfied, hit Enter on your keyboard (or click the green checkmark on the toolbar) to finish generating the result.
I'm delighted every time I do one of these operations. Modeling this "by hand" would take so long that I doubt I'd even bother attempting it.
Cool variation #1: Twisting
While you’re still in Preview mode, clicking on black part of your preview object opens yet another set of controls. The Properties of the Edited Junction window shows you more information about the connections in the operation you’re doing. My favorite widgets here have to do with twisting; they let you rotate either of your profiles (in this case, the circle and the square) by 15 or 90 degree increments. The result is an insanely cool twisting effect. Click the little right and left arrows and you’ll see what I mean. Addictive, no?
Twisting 3D forms is one of those things that SketchUp modelers have resigned themselves to never being able to do. When I discovered this functionality in Curviloft, I got up and danced around.
Cool variation #2: Offset profiles
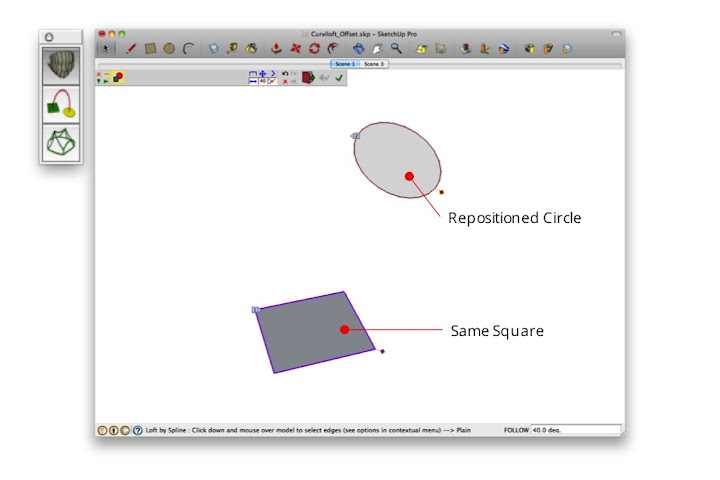
Loft by Spline works great on profiles that aren’t lined up perfectly, too. Below, I’ve moved and rotated the circle.
Your profiles don't have to be directly on top of one another to use Loft by Spline.
Again, trying different Spline Method settings produces pretty wildly different results.
Using straight splines connects the profiles in a very direct manner. Choosing a curvy spline method produces a much jauntier shape.
I dare you not to waste an afternoon playing with Curviloft. The other two tools in the set let you loft along a path and "skin" connected profile edges, but Loft by Spline is pretty powerful on its own. Remember that Curviloft is donationware, meaning that if you like it, you can contribute to its author; you'll find an option to do so in the Curviloft menu after you install it.
Here are some quick examples of shapes I whipped up while I was working on this post:
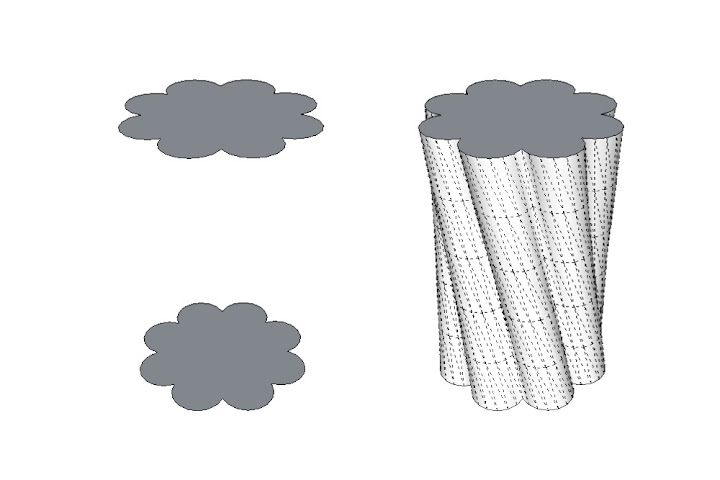
Both profiles are identical, but I used the twist options to spiff things up a little.
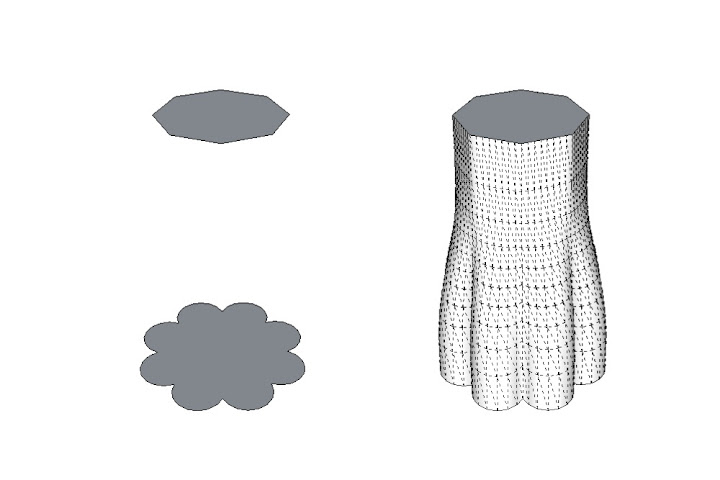
Lofting between a complex profile and a simple one can be tricky, but the smooth transition that ensues is always lovely. Rocket? Tree trunk? Bicycle handlebar grip?
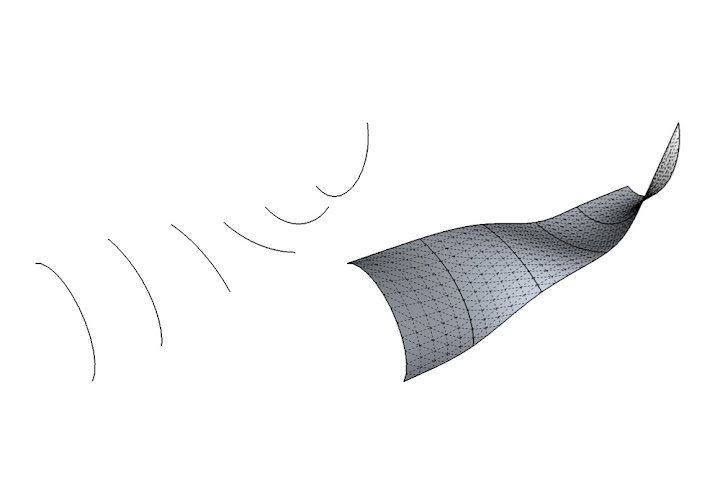
Your profiles needn't be fully-enclosed faces. Try lofting between arcs and other edges to produce all kinds of things that would be painful to model without Curviloft.
I used Curviloft to model parts of this queen I'm making. Some of us on the SketchUp team are collaborating on a 3D printed chess set.
I've written about a couple of Fredo6's other terrific plugins in the past. RoundCorner gives you the ability to quickly and easily create rounds and fillets on almost any shape.FredoScale is a toolkit for stretching, bending, twisting and otherwise deforming your models in incredibly useful ways.

